This article contains the following:
Installation under Linux with GUI
Silent Install on Linux - the options file
Maintenance, Backup, Update, Restore and Uninstallation
Installation under Linux with GUI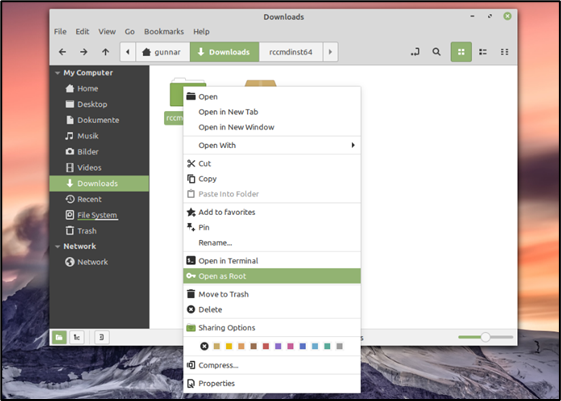
In this case, we have chosen a Linux Mint “Ulyana 64-bit” with the Cinnamon GUI. Please note that other distributions, derivatives and GUIs may differ. Please refer to the appropriate user’s manual for your operating system.
Download and unpack the software
After downloading your copy of RCCMD, you need to unpack the file before installation is possible.
Please ensure that the files are unpacked and not just a preview of the archived files. The installation will not work with packed files.
Installing RCCMD
For the installation, elevated system rights are necessary. To get elevated system rights, open the unpacked folder as system administrator.
Once you have opened the directory correctly, you will see a note that you are working within the directory with elevated rights.
With a double-click on installer.run, the installation process will start.
The installation screen overview:
Run the file “rccmdinstaller.run” with a double-click.
Select language
And click “Forward”
The license agreement:
In this step, you can review the license agreement. To continue the installation, you must accept these terms. If you do not agree, the installation process will be terminated without making any changes to your system.
Accept the agreement and click “Next”
The License Key
Please enter the license key you bought with your copy of RCCMD. If you do not have a key to hand, leave the field blank - RCCMD will then automatically use a 31-day evaluation key, after which the client will deactivate itself until a valid license is entered. The operating system is not affected by this. Please note that you can use as many RCCMD clients in your network as you like, but each license key can only be used once.
As soon as a client is started with the key, the following client will terminate its service with the message “License Fraud”.
Only the so-called Corporate Key is valid for a certain number of clients and can therefore be entered several times. For more information about the corporate key, please contact your local dealer. If you want to reuse a key, simply uninstall the corresponding RCCMD installation that is no longer needed.
Note:
You can change the license key at any time via the Advanced Settings in the RCCMD configuration menu.
Setup Types
Choose the installation type. There are two basic ways to carry out the installation:
Standard installation
The standard installation will be carried out with a default configuration that holds all recommended basic settings for your RCCMD software.
For post-installation configuration, the following settings are pre-defined:
| https://127.0.0.1:8443 | The Local Host: The RCCMD web configurator will serve your access attempt. |
| https:// [IP address of the computer]:8443 | The web interface can also be opened by any computer that is within the same network segment or a reachable network |
| Default password | RCCMD |
Custom installation
This installation type offers an installation dialog to adjust the installation more precisely. Please note that the changed parameters may require additional administrative adjustments in the operating system. This type of installation is therefore only recommended for experienced users.
RCCMD offers options as follows:
Destination Folder
The default installation will be carried out at /opt/rccmd.
If needed, please adapt the destination path.
For a graphical file browser, click this icon.
Adapt the modules
The RCCMD service is mandatory for the operation of RCCMD, therefore it cannot be selected or deselected.
The RCCMD Configurator provides a web interface through which all necessary settings can be made after the installation. The web interface can be reached under the following addresses:
| https://127.0.0.1:8443 | The Local Host: The RCCMD web configurator will serve your access attempt. |
| https:// [IP address of the computer]:8443 | The web interface can also be opened by any computer that is within the same network segment or a reachable network |
RCCMD Messaging Outputs
By default, all messages that RCCMD receives and wants to pass on will be directed to the console.
With these settings, an additional alarm behavior can be configured:
- Display on all terminals: The message is displayed on all open terminals.
- Log messages: The messages are logged
- Display messages with XMessage:
In case of a GUI, a pop-up window appears to show RCCMD messages.
Configure the Web Interface of RCCMD
By default, the web interface of RCCMD is addressed via HTTPS and TCP port 8443. Edit the settings accordingly to adapt the RCCMD to fit your network infrastructure. The default password is generally RCCMD. You can adapt it to your needs at a later time via the web interface.
Installation Summary
Depending on whether you have selected the standard installation or the manual installation, you can review your selection here. Up to this point, RCCCMD has not yet carried out any installation work.
Linux: Finalizing the installation
RCCMD automatically installs and configures all necessary components. Afterwards, you can access the web interface by entering the IP address of the computer:
How to access the web interface:
- https://127.0.0.1:8443,
- https:// [IP address of the computer]:8443,
- https://localhost:8443
Password: RCCMD or your selected password.
The graphical installation of RCCMD is now completed. Please continue with the configuration of RCCMD via the web menu.
Console installation
Basically, the console installation needs the same configuration steps as with the graphical installer.
The following installation example shows the installation on a Linux Mint 20.1 “Ulyssa”. Please note that the exact installation commands may differ with your Linux version.
After logon and downloading RCCMD, change to the appropriate download directory and first unpack the file rccmd64.tar.
Then change to the newly created directory with the unpacked installation files.
Expand system rights
Since system-relevant changes must be done during installation that are reserved for a system administrator, elevated system rights are required:
Command: sudo su
With the command sudo su, the necessary elevated rights can be obtained until you revoke them with the command “exit”. You can recognize this by the fact that the username is preceded by “root@”.
This completes the preparatory work and you can start the installation dialog.
The installation dialogs
In this mode, the installer offers an interactive setup that guides you comfortably through the installation process. The setup is called up via ./rccmdinstaller.run.
Command: ./rccmdinstaller.run
Language selection
The language selection defines the language the installer should use. You can select another language later within RCCMD. Select your preferred installation language.
Copyrights, terms of use and license
While we do not believe that anyone has ever enough time to read this license agreement, in order to use the RCCMD software it is necessary to accept the terms of use and license agreements. So, contrary to the recommendation to read carefully, press the Enter key until you can accept the terms of use document directly:
If you do not agree, the installer will exit and no changes will be made to your operating system and the installation dialog will close.
If you agree, press “y” and confirm with Enter your decision.
The text-based installer:
Part 1: The key
Enter the license key of your RCCMD software here. You can obtain the license key for a fee from your UPS provider. If you have purchased a CS141 Web manager with your UPS, a license is already included.
If you do not have the key at hand, leave this field empty, RCCMD will automatically use an evaluation key. You can change the key later in the configuration menu of RCCMD and thus activate your copy permanently.
Part 2: The Setup Type
The setup type defines how many changes can be done during installation.
In general, there are two different setup styles:
-
Recommended settings
RCCMD selects the required components for you in order to grant error-free configuration and operation
-
Custom installation
In this installation mode, you can decide which program parts of RCCMD are to be installed. Please note that the individual modules are coordinated with each other. If you do not install some modules, it may result in RCCMD not functioning properly. This mode is only recommended for experienced users.
If Option 1 is selected:
The setup tool selects the recommended default setting for you and prepares the installation for you:
You will get a small overview of the modules, access method and the installation path. When you confirm, the installation of RCCMD starts. With “Cancel”, at this point, the installation is withdrawn and the setup program quits.
Option 2: Custom installation
Adapt the installation to fit your infrastructure:
Destination Folder:
By default, RCCMD uses /opt/rccmd for the program data. If necessary, adapt the destination folder to your file system.
RCCMD Service and Configurator
The RCCMD service is mandatory – this service manages your shutdown procedure
The RCCMD Configurator is the configuration interface for the RCCMD service. Unless you know exactly what you want to do, we recommend installing this module.
RCCMD Messages
RCCMD is capable of receiving and displaying both automatically generated status messages and custom-configured text messages on system events within your UPS or BACS from all units of the CS121 and CS141 product family. With this setting you can define where the received messages are displayed accordingly.
Log RCCMD messages
All units of the CS121 and CS141 product family automatically create an event log with a timestamp for the system events. Therefore, it is normally not necessary to record all incoming messages. If you want to record the incoming messages, activate this function.
XMessage for RCCMD
If a graphical user interface is in use, RCCMD can display the messages as pop-up windows.
Web protocol, port selection and password
The web interface can be accessed via HTTP as well as HTTPS, with HTTPS enabled by default. You can adapt this setting to your requirements later via the configurator. For the correct setting, contact the local administrator.
TCP/IP port
The port specification defines which port the web interface can be reached on. As a default setting, RCCMD uses port 8443 for its interface. Please refer to the local administrator to get the correct setting – the port must be available and may have to be enabled within firewall solutions and port settings.
Password
Define the login password of RCCMD. This password will be used later when logging in to the web interface. If you want to assign the password later during configuration work, leave the field empty and confirm with Enter. By doing so, the default password “RCCMD” is automatically active.
Installation summary and start installation
Up to this point, no changes have been made to your system. If you cancel the installation, your entries will be discarded and you will revert to the standard installation.
Completing the installation:
The configuration work is done—RCCMD automatically carries out the installation
Note:
By default, RCCMD is preconfigured to manage the shutdown of the operating system upon receiving a valid RCCMD shutdown signal. However, since you have not yet defined the conditions under which a shutdown signal is to be sent or authorized a specific sender, just activating it could lead to unpleasant surprises, e.g., if team members test the shutdown management at the same time.
Before you start the service within a productive environment (and thus "arm" the shutdown), we recommend a quick configuration via the convenient web interface.
The installation is finished, you may proceed with the configuration work.
How to access the web interface:
- http(s)://127.0.0.1:8443,
- http(s):// [ IP address of the computer]:8443,
- http(s)://localhost:8443
Password: RCCMD or your own configured password.
For the quick configuration via the web interface refer to the RCCMD manual chapter:
RCCMD Quick Configuration: Windows, Linux, and macOS
Silent Install on Linux - the options file
Silent Install is a special mode in which all parameters necessary for the installation are stored in a central answer file.
Creating an options file for silent install / scripted roll out
Open a text editor and save the file, for example as rccmd-answer.txt. The file structure has no special characters or special format symbols.
Note:
To help you creating your own answer (options) file, a well-commented options.txt sample file is included with the installation files
For a complete silent install, we recommend the following options setup:
| installer-language=de | Define the installer language (de/en) |
| mode=unattended | Select your preferred installation mode |
| unattendedmodeui=none | Is an interactive mode generally allowed or wanted? |
| installdir= /opt/rccmd | Default installation path |
| rccmd_license_key= | RCCMD key for this installation. If you don't have a key at hand, leave the field blank. RCCMD is then installed with an evaluation key. Note: Since OEM 12 is default, your UPS may not be listed. |
| setup_type_choice=standard_choice | Configuration dialog to “Default” |
| rccmd_configurator_set=1 | Installs the configuration interface* |
| messageDisplay=1 | Displays RCCMD plain text messages on all consoles* |
| logMessages=1 | Option: This feature will write all console messages to the RCCMD logfile rccmd.log. * |
| xMessage=1 | Popup Windows for Linux operating systems with a GUI installed. * |
| configurator_protocol=HTTPS | Defines the HTTP default access method for the RCCMD interface. |
| configurator_port=8443 | Defines the RCCMD port for reaching CS141 devices. |
| configurator_password=RCCMD | Default password for the RCCMD user interface |
| start_rccmd_service=1 | Defines the start condition of the RCCMD service after installation. * |
| startmenu_shortcut=1 | Shall shortcuts be added to the start menu? * |
| desktop_shortcut=0 | Shall RCCMD icons be shown on the desktop * |
| open_rccmd_configurator=0 | Define if the configuration dialog shall be started directly after installation. Note: This setup does only make sense in case your operating system provides a GUI * |
* 1 = YES / 0= NO
Execute Command: ./rccmdinstaller.run --optionfile [RCCMD-optionsfile].txt
The installation is finished; you may proceed with the configuration work.
How to access the web interface:
- http(s)://127.0.0.1:8443,
- http(s):// [ IP address of the computer]:8443,
- http(s)://localhost:8443
Password: RCCMD or your own configured password.
For the quick configuration via the web interface refer to the RCCMD manual chapter:
RCCMD Quick Configuration: Windows, Linux, and macOS
Maintenance, Backup, Update, Restore and Uninstallation
Note:
The following instructions deal with uninstallation on Linux Mint (!) using a standard installation in /opt/rccmd/ — depending on the distribution and your specifications during installation, installation paths, procedures and required parameters may differ from these instructions. Please keep in mind that older versions of RCCMD used /usr/rccmd as the installation path.
In this case, you will find the exact commands in the help section of the Linux distribution you are using.
Creating a backup file
Please keep in mind: Depending on the user that is currently logged in, you may need to increase the current system rights with the command sudo su. Before installing a new (updated) version of RCCMD, cleanly uninstall the old RCCMD version. Depending on the configuration, data backup as a preparatory measure can save a lot of work. To create a data backup, some configuration work is necessary:
- Create a backup that holds these files
- Uninstalling the existing RCCMD client
- Installing the new/updated RCCMD client
-
Implement the backup files.
Step 1: Create a backup file:
Open the directory /opt/rccmd
Save a copy of this file:
- “rccmd.cfg”
Switch to the directory /opt/rccmd/webconfig/resources
Save a copy of these files:
- rccmdConfig_eclipse.properties
- realm.properties
-
Save all custom scripts and folders you want to hold.
Step 2/3: Do the installation work
Uninstall the existing RCCMD software and then install the new RCCMD software.
Step 4: Import the backup files:
The import of the backup is carried out in a similar way as the backup:
- Copy all custom scripts back to the original folders.
- Switch to the directory /opt/rccmd
- Place your saved “rccmd.cfg” here and, if necessary, overwrite the existing file
Move on to the directory /opt/rccmd/webconfig/resources
Place the following files from your backup here and, if necessary, overwrite any existing files:
- rccmdConfig_eclipse.properties
- realm.properties
To reload your active RCCMD settings, restart RCCMD.
Check settings and functions.
Uninstalling RCCMD for Linux
The following instructions deal with the uninstallation of RCCMD for Linux under Linux Mint (!) that was carried out with a standard installation at /opt/rccmd/ - Depending on the distribution and Linux modules as well as user-defined specifications during the installation, installation paths, procedures and required parameters may differ from these instructions. If in doubt, please contact the vendor of your Linux operating system or refer to our technical support at support@generex.de:
Simple method for a Linux with an active GUI
Option 1: Use the installer
When installing RCCMD for the first time, this feature is not noticeable because there is no installed version of RCCMD yet.
When updating to a higher program version, however, the old RCCMD version must first be uninstalled. For this purpose, the installer provides the corresponding caller routine.
To do this, open the RCCMD installation package as system administrator and start the file “rccmdinstaller.run” with a double click.
The installer automatically recognizes that RCCMD is already installed and offers to uninstall it automatically. Confirm the uninstallation with “Yes” and confirm that you want to uninstall all modules.
The uninstallation will be carried out automatically:
After the uninstallation is done, just click “Abort” to cancel the installation dialog of RCCMD.
Note:
Uninstalling via the package and app management is specific to the respective Linux distribution and also depends on the personal taste of the system administrator. For more information about how to uninstall a program via the system settings, please refer to the user manual of the respective Linux distribution.
Uninstalling RCCMD via console
RCCMD also comes with its own uninstallation program that you can call directly from the installation directory.
To do this, first open a terminal window. To access the installation directory /opt/rccmd, you first need increased system rights:
To do this, first open a terminal window. But to access the installation directory /opt/rccmd, you first need increased system rights:
Command: sudo su
You can recognize success by the fact that “root@” appears in front of your user name.
Starting the uninstallation
Now switch to the installation path of RCCMD to start the uninstallation:
Command 1: cd /opt/rccmd
Command 2: dir
Command 3: Uninstall_RCCMD/uninstall
First, change to the installation directory of RCCMD with the command “cd /opt/rccmd” and make sure with the command “dir” that you are in the correct directory and that the file Uninstall_RCCMD is present.
As soon as you enter Uninstall_RCCMD/uninstall and confirm with Enter, the dialog for the uninstallation starts, which will guide you through the procedure:
Uninstalling if no GUI is present
The direct uninstallation can also be triggered from the installation directory of RCCMD directly. By default, this is located under /opt/rccmd. To get there, however, you need elevated system rights after logging in:
Command: sudo su
Initiate uninstall
Switch to the installation path of RCCMD:
Command 1: cd /opt/rccmd
Command 2: dir
Command 3: Uninstall_RCCMD/uninstall
First, change to the installation directory of RCCMD with the command “cd /opt/rccmd” and make sure with the command “dir” that you are in the correct directory and that the file Uninstall_RCCMD is present. As soon as you enter Uninstall_RCCMD/uninstall and confirm with Enter, the dialog for the uninstallation starts, which will guide you through the procedure:
The uninstallation is done, press Enter to return to your console.
v.: 2025-08-26
Comments
0 comments
Please sign in to leave a comment.